Considerations for Solar Energy System(Renewable Energy)
- Determine whether you want to install a solar hot water system or one to generate electricity, or both.
- Solar panels should be orientated to receive the maximum amount of daily and seasonal sunlight. In the Northern hemisphere solar panels should be facing due south. In the southern hemisphere solar panels should be facing due north. A variance of 45° won’t make much of an impact on performance.
- Your roof orientation. Has your house got a roof facing the sun most of the day?
- Look at landscaping and surrounding buildings that might shade the panels.
- The more sunny the better, but solar panels perform very well in cloudy conditions too.
- The optimal angle is equal to your latitude, although most panels are fixed to whatever angle the roof is tilting without impacting performance.
- What amount of electricity do you need to power your load? The easiest way to determine your household’s use is to look at your electricity bills. It’s best to use an average of a full year.
- Great savings can be had by just installing energy efficient appliances and implementing other energy saving measures.
- Keep in mind that additional balance-of-system equipment will be required to transfer the generated electricity to the appliances in your house.
- Always use a qualified professional to connect the electric components.
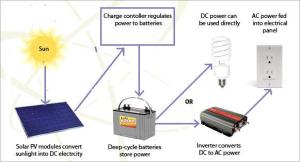
Components of Solar Energy System
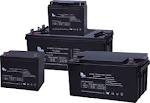
- Battery Bank
- Solar Panel
- Solar Panel Mount
- Charge Controller
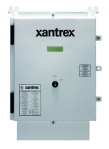
- Inverter
- Metering
Tools Required for Installation of Solar Power System
Cable cutters
Red electrical tape
Screwdriver
Drill
Crescent Wrench
Circuit Diagram of Solar Power System
Steps for Installing a Solar Panel System
- Prepare Batteries.
Dry batteries are costly but more durable than lead- acid batteries. The first thing you want to do is charge your batteries with a charger. This will insure they are charged to capacity and ready to go at set up. While the batteries are charging, you can set up the solar panels and get them wired up and ready to go.
- Fix Batteries in a Container.
Once the batteries are fully charged, place them in the container and. Make sure all the positive (+) terminals are on one side and negative (-) on the other. Once in place, measure from terminal to terminal to make the jumpers.
-
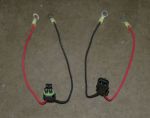
Make Jumpers. To connect the batteries in parallel, make some jumpers out of 2 AWG cable. Make sure to size your jumpers for your system. If you want to use a larger inverter you will need to use larger cable. 1200 Watts/12 Volts = 100 Amps. Depending on where you look, 2 AWG cable is good for around 100 Amps. If you want to run say, a 2400 watt inverter, you should use 2 cables per jumper. Measure between terminals and cut cable to length. Then add the mechanical lugs.
- Connect Charge Controller and DC to AC Inverter to the Battery.
Make sure the inverter is turned off and the charge controller is not connected to the solar panels yet.
- Connect Charge Controller to the Solar Panel. Make sure that the inverter is OFF.
-
Connect Inverter to the load. After connection of inverter to the load switch ON the Inverter.
TOPICS COVERED
- Considerations for Solar Energy System(Renewable Energy)
- Components of Solar Energy System
- Tools Required for Installation of Solar Power System
- Circuit Diagram of Solar Power System
- Steps for Installing a Solar Panel System
Related articles
- Comaprison -12 V Solar Panel Vs 24 V Solar Panel (enersol.wordpress.com)
- Solar Energy-Installation Guide for Solar Panel System (enersol.wordpress.com)
- Photovoltic or Solar Power Inverters (enersol.wordpress.com)


